The paper piles…we all have them. Paper clutter occurs and it can easily get out of hand. But with these 5 simple steps, together we can tackle the paper clutter.
The stacks of paper in your home can leave you feeling overwhelmed. But, breathe… I’ve got some easy steps for you to follow.
This step by step guide was created to quickly bring you relief from the paper piles that can cause you anxiety and stress. Often times, when we think of organizing our papers, we think we need more storage bins and file folders–but wait this is not always the case.
First, before buying any storage containers, it’s essential to first clear away excess papers. Then later, you can decide if you want to purchase more storage containers.
Before we get started, it will be helpful to have the following items
1. Shallow box-for priority papers. ( check and see if you have something around the house, such as a basket or container.
2. Medium size box-for all other documents that need to be sorted /filed
3. Binder clips– if you don’t have a lot of papers, you can separate your papers instead of boxes.
4. Recycle bin/trash bag
SIMPLE STEPS TO ORGANIZE YOUR PAPER PILES
STEP 1. GATHER YOUR PAPERS AND MOVE TO ONE LOCATION
Create a clean surface to work on. Grab a trash bag, recycling bin, and both of your boxes. Depending on how many papers you have, you may need an extra box.
STEP 2. REMOVE JUNK MAIL
Start purging the obvious junk mail from your paper piles. Pull out any thick pieces such as catalogs and magazines and toss them into the recycle bin if they are not current or if you know it’s junk mail.
Be mindful if the paperwork in the recycle bin needs to be shredded or not. Shred anything with identifying information beyond your name and address. This would include social security numbers, dates of birth, credit card offers, etc.
Get rid of expired coupons, notes, and business cards of people you can’t recall meeting (or foresee contracting). After tackling step two, you can instantly see you have a smaller pile. Breathe a sigh of relief… you are making progress.
STEP 3. NEXT, PULL OUT IMPORTANT PAPERS
Begin to do a rough sort by gathering up the important papers that need an action from you. Begin to add your papers to the “priority action” box. You can choose to name it something else that resonates with you if you like.
This box is for all papers that require action such as forms that need to be completed or bills that need to be paid or reviewed for accuracy. Most experts suggest you can toss monthly statements once you’ve checked them for accuracy, unless they’re your only record of a tax-related transaction.
STEP 4. GATHER REMAINING PAPERS IN YOUR PAPER PILE
Add these papers to your medium size box. You may find that you still have some coupons and miscellaneous papers left to sort. These can be sorted into further categories later. For example, if you collect coupons, you’ll want to have one place to store all of your coupons such as an envelope.
Now, you should have two boxes of papers. One for “priority action” papers that need an action from you and one for all your other papers and documents that need to be filed to your permanent file storage.
STEP 5 MAKE A DATE WITH YOURSELF TO SORT PAPERS ON YOUR CALENDAR
Make a 15- 20-minute date with yourself twice a week to sift through the papers in the “priority action” and medium box. In this step, you will handle papers that require an action: view and put events, appointments, and relevant information into your calendar and lastly file papers that need to be kept to your permanent file location. Papers that need an action can be broken down into further categories like archive/reference, response, etc. During this session, you can also shred any papers that contain personal information.
You can throw away receipts for most purchases that you know you will not need for a return. If you paid with a debit or credit card, keep those receipts in an envelope until you’ve checked to make sure your credit or bank card statement is accurate. It’s helpful to have an individual compartment to store smaller papers such as coupons and receipts in a pocket accordion file organizer like this which was also mentioned above.
TIDY UP YOUR SPACE
Now, it’s time to tidy up the work space so you’ll have a fresh start at your next session. You are well on your way to tackling the paper piles! See, it’s more fun to have a buddy to help you sort through the piles. Breathe a sigh of relief…you are making great progress!
Scheduling these paper dates puts an end to procrastination because you don’t have to tackle everything all at once. Realistically most people are not able to clear through the paper piles all at once.
To avoid future paper piles, there needs to be a home for all your documents that you want to keep. Clutter happens when things don’t have a home. The best time to find a home for things is when your space is clear and bare. You’ll have a better idea of what your space is capable of holding.
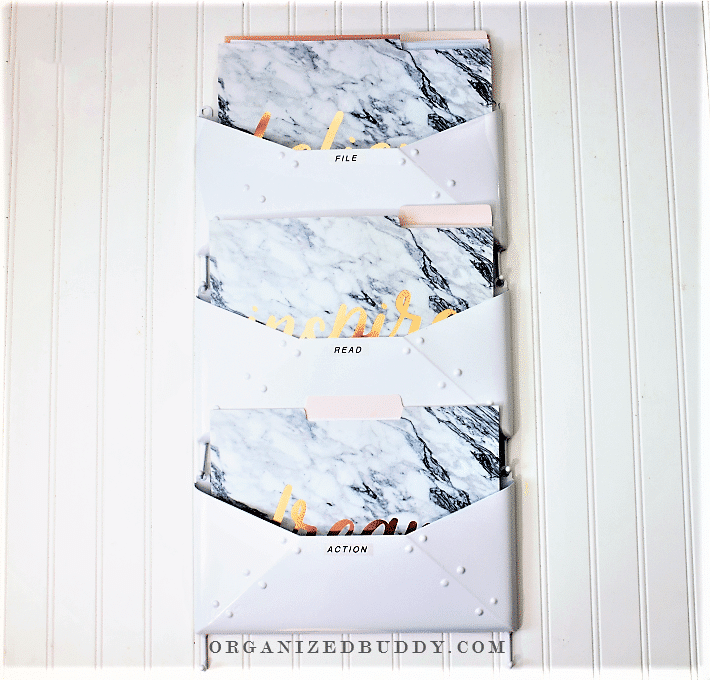
Organizational expert Stephanie Culp recommends to have four baskets for your paper. I personally like to have just three. I don’t have a lot of paper bills coming in and so I combine my “to do” basket with my “to pay” basket and use a file folder to separate them. I used these folders for my wall file storage system. See below for example:
- A To Do basket or Action
- A To Pay basket
- A To File basket
- A To Read basket
This is the storage system I currently use so that I can avoid future paper piles. Papers can easily be added to this decorative wall storage system. I like that it blends in with the decor and I love that I don’t have anymore paper piles on the counters.
Simple Solutions to Keep Those Paper Piles Tamed!
1. Keep documents neatly stored in these. They look attractive and also frees up counter space.
2. You can also save space with door storage like this.
3. I like this for organizing magazines that you want to keep .This is the perfect solution to keep them off the floor and out of the way.
This simple 5 step system is my go to guide when I want to help someone organize unruly paper piles, or to simply organize my own piles when they get out of hand. Life happens, sometimes unexpected events occur and piles can form. That’s okay, this guide will get you back on track. Now that you have a system in place to get rid of the paper piles, you’re ready to check out these solutions to reduce incoming mail and papers.
Do you have a favorite organizing tip or maybe you have a favorite product that helps keep you organized? Please share as we can all learn from one another!
Happy Organizing!